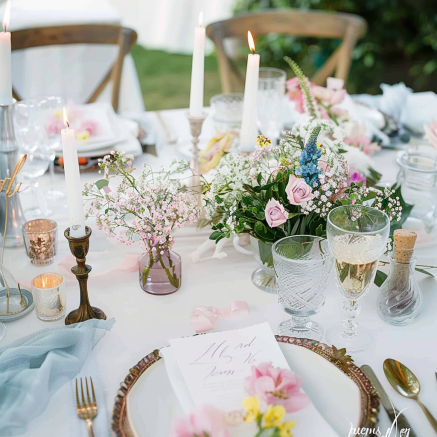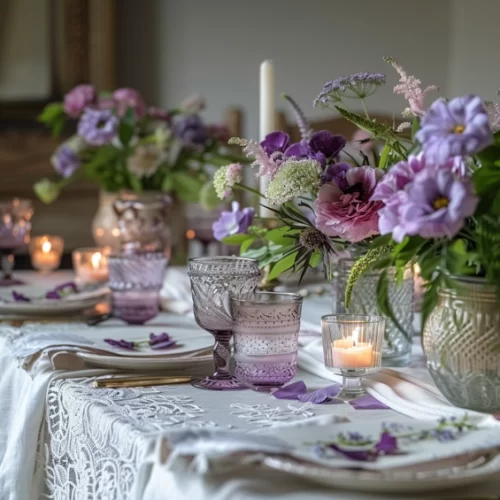
A How-To Guide – Creating your own DIY party decorations!
Hosting a dinner party is more than just serving yummy food—it’s about creating a fun and inviting atmosphere! DIY decorations can make your space look amazing without spending a lot of money. This guide will show you how to craft beautiful and unique decorations to impress your guests and create a memorable evening.
Centerpieces
Centerpieces are the stars of your dining table. They make everything look special. Here are some easy and fun ideas:
- Mason Jar Centerpieces:
- Materials: Mason jars, fairy lights or candles, flowers, decorative stones.
- Instructions: Fill mason jars with fairy lights or candles to create a warm, inviting glow. Add flowers for a pop of color or decorative stones for a rustic look. You can also paint the jars or wrap them with burlap and lace for added charm.
- Seasonal Centerpieces:
- Fall: Use pumpkins, gourds, and autumn leaves. Hollow out small pumpkins to use as vases for flowers.
- Winter: Use pinecones, holly, and branches sprayed with white paint for a snowy effect.
- Spring: Incorporate fresh flowers, pastel-colored eggs, and small potted plants.
- Summer: Use seashells, sand, and brightly colored flowers like sunflowers and daisies.
- Fruit Centerpieces:
- Materials: Clear bowls or vases, fresh fruits like lemons, limes, oranges, or berries.
- Instructions: Fill clear bowls or vases with colorful fruits to add a fresh, vibrant touch to your table. You can also mix fruits with flowers for a more elaborate display.
- Floating Candles:
- Materials: Shallow bowls or vases, water, floating candles, flower petals.
- Instructions: Fill bowls or vases with water and place floating candles and flower petals on the surface. This creates a serene and elegant centerpiece.
Table Runners
Table runners add style to your table and tie your theme together. Here are some DIY ideas:
- Kraft Paper Table Runner:
- Materials: Kraft paper, markers or paint pens.
- Instructions: Roll out kraft paper down the center of your table and cut to size. Use markers or paint pens to write messages, draw patterns, or decorate according to your theme. This adds a personal touch and is easy to clean up afterward.
- Fabric Table Runner:
- Materials: Fabric of your choice, scissors, fabric glue or sewing machine.
- Instructions: Cut fabric to the desired length and width. Hem the edges using fabric glue or by sewing. Choose fabrics that match your theme, like burlap for a rustic look or satin for a more elegant setting.
- Greenery Table Runner:
- Materials: Fresh greenery like eucalyptus, ferns, or ivy.
- Instructions: Lay greenery down the center of your table, weaving the branches together to create a continuous runner. Add flowers or candles for extra decoration.
- Ribbon Table Runner:
- Materials: Various ribbons in coordinating colors and patterns.
- Instructions: Lay ribbons across the table either horizontally or vertically. You can layer different widths and colors to create a dynamic look.
Place Cards
Place cards help guests find their seats and add a personal touch. Here are some creative ideas:
- Chalkboard Place Cards:
- Materials: Small chalkboards or chalkboard paint, chalk or chalk markers.
- Instructions: Write each guest’s name on a small chalkboard. You can also paint small pieces of wood or other materials with chalkboard paint to create your own chalkboard place cards.
- Leaf Place Cards:
- Materials: Large leaves (real or faux), metallic pens.
- Instructions: Write each guest’s name on a large leaf using a metallic pen. This works especially well for fall-themed parties.
- Stone Place Cards:
- Materials: Smooth stones, paint or paint pens.
- Instructions: Paint each stone and write a guest’s name on it. These can double as keepsakes for your guests.
- Mini Picture Frame Place Cards:
- Materials: Small picture frames, cardstock, pens or markers.
- Instructions: Write each guest’s name on a piece of cardstock and place it in a mini picture frame. These frames can also be decorated to match your theme.
Hanging Decorations
Hanging decorations can transform your space and add a whimsical touch. Here are some easy DIY ideas:
- Paper Lanterns:
- Materials: Colored paper, scissors, glue, string or ribbon.
- Instructions: Cut and fold paper to create lantern shapes. Glue the edges together and attach a string or ribbon to hang them. You can also add LED lights inside for a glowing effect.
- String Lights:
- Materials: String lights, clothespins or hooks.
- Instructions: Hang string lights around the room, along walls, or over outdoor spaces. Use clothespins or hooks to secure them in place. String lights add a magical, twinkling effect to any setting.
- Paper Garlands:
- Materials: Colored paper or cardstock, scissors, string or ribbon.
- Instructions: Cut paper into shapes like circles, stars, or hearts. Punch holes and thread them onto a string or ribbon to create a garland. Hang the garland above the dining table or around the room.
- Hanging Flowers:
- Materials: Fresh or faux flowers, string, hooks or nails.
- Instructions: Tie flowers to lengths of string and hang them from the ceiling or along walls. This creates a beautiful and romantic atmosphere.
Napkin Rings
Napkin rings can add a finishing touch to your table setting. Here are some simple and elegant ideas:
- Ribbon Napkin Rings:
- Materials: Ribbon, scissors.
- Instructions: Cut ribbon into lengths long enough to wrap around a napkin. Tie in a bow or knot for a simple yet elegant look.
- Twine and Greenery Napkin Rings:
- Materials: Twine, small sprigs of greenery (like rosemary or thyme).
- Instructions: Wrap twine around the napkin and tuck a small sprig of greenery into the twine. This adds a rustic and natural touch to your table.
- Beaded Napkin Rings:
- Materials: Wire or elastic string, beads.
- Instructions: Thread beads onto wire or elastic string, leaving enough room to wrap around a napkin. Twist the ends together to secure.
- Paper Napkin Rings:
- Materials: Decorative paper, scissors, glue.
- Instructions: Cut paper into strips and decorate as desired. Glue the ends together to form a ring.
DIY Invitations
Creating your own DIY invitations can add a personal touch to your dinner party and get your guests excited. Here are some fun and creative ideas:
- Handwritten Invitations:
- Materials: Quality cardstock, pens, envelopes.
- Instructions: Write your invitations by hand using colorful pens. Add personal messages and details about the dinner party. This adds a charming and personal touch that digital invites can’t match.
- Printable Invitations:
- Materials: Printable templates, printer, cardstock.
- Instructions: Use online templates to design your invitations. Print them on quality cardstock and add any personal touches with markers or stickers. This method is quick and looks professional.
- Craft Paper Invitations:
- Materials: Craft paper, stamps, ink pads, ribbon.
- Instructions: Use craft paper and stamps to create rustic, charming invitations. Tie them with ribbon for an extra special touch. These are perfect for a rustic or vintage-themed dinner party.
- Photo Invitations:
- Materials: Photos, cardstock, glue, pens.
- Instructions: Use a favorite photo as the background for your invitation. Glue the photo onto cardstock and write your party details around it. This is a great way to personalize your invites.
- Digital Invitations:
- Materials: Email or messaging apps, digital design software.
- Instructions: Design your invitations using digital tools and send them via email or messaging apps. This is a convenient and eco-friendly option.
DIY Menus
DIY menus can add a stylish touch to your dinner party and inform your guests about the delicious dishes you’ll be serving. Here are some creative ideas:
- Chalkboard Menus:
- Materials: Small chalkboards, chalk or chalk markers.
- Instructions: Write your menu on small chalkboards and place them on the table or around the dining area. This adds a rustic and charming touch to your setup.
- Printed Menus:
- Materials: Printable templates, printer, cardstock.
- Instructions: Design your menus using online templates and print them on quality cardstock. You can customize them to match your party theme and place them at each setting or in frames around the table.
- Chalkboard Menus:
- Materials: Craft paper, stamps, ink pads, markers, pens, ribbons, twine, scissors, glue.
- Instructions: Cut craft paper to size. Stamp designs and let dry. Write menu items with markers. Add decorations like ribbons and twine. Assemble with glue if multi-page.
There you have it – a DIY Dinner Party Decor Guide
Creating stunning DIY dinner party decorations is all about creativity and personalization. Whether you’re crafting beautiful centerpieces, stylish table runners, unique place cards, whimsical hanging decorations, or elegant napkin rings, your personal touch will shine through. Additionally, designing your own DIY menus and invitations adds a special flair to the event. These easy and fun projects will make your dinner party look amazing and make your guests feel special.


